In this tutorial, we will explain to you how to create a modern, hybrid, mobile application from your WordPress website.
We’ll be using such technologies as:
- WordPress website with a few additionally loaded plugins. We placed emphasis on you not knowing PHP basics and while choosing plugins, we confined ourselves only to free solutions that are in the public domain.
- Ionic, Angular.js, Node Package Manager (npm), Gulp, Cordova – the solutions that will help us to build our mobile app.
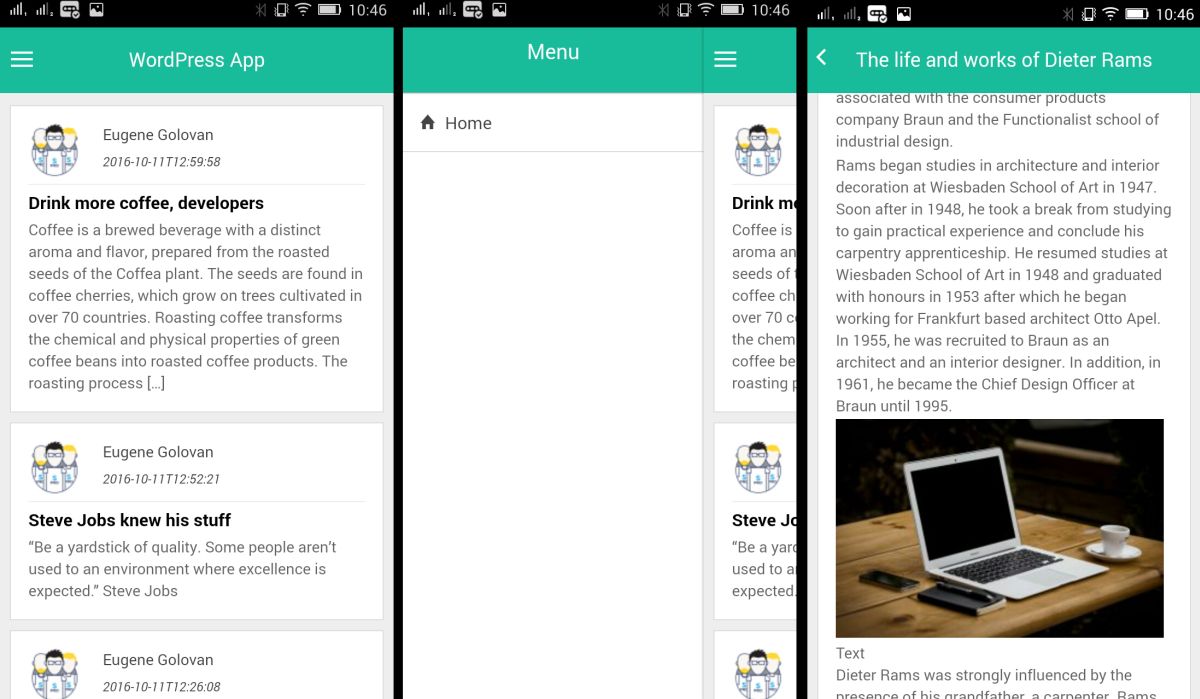
At the end of this tutorial, you will get a fully functional mobile app available for download on Github. It has several modules, ready for use:
- Menu;
- a Home page module that displays your latest posts using infinitive load technology;
- Post page;
- a Style installation of the application appearance module;
- a Data receive module.

Step 1. Requirements
- A working WordPress website;
- A machine with installed Node.js, npm, Ionic, Cordova;
- Basic knowledge of Angular.js, Ionic, and npm.
Step 2. Setting up a website
You will need to install several additional plugins for the application with WordPress REST API.
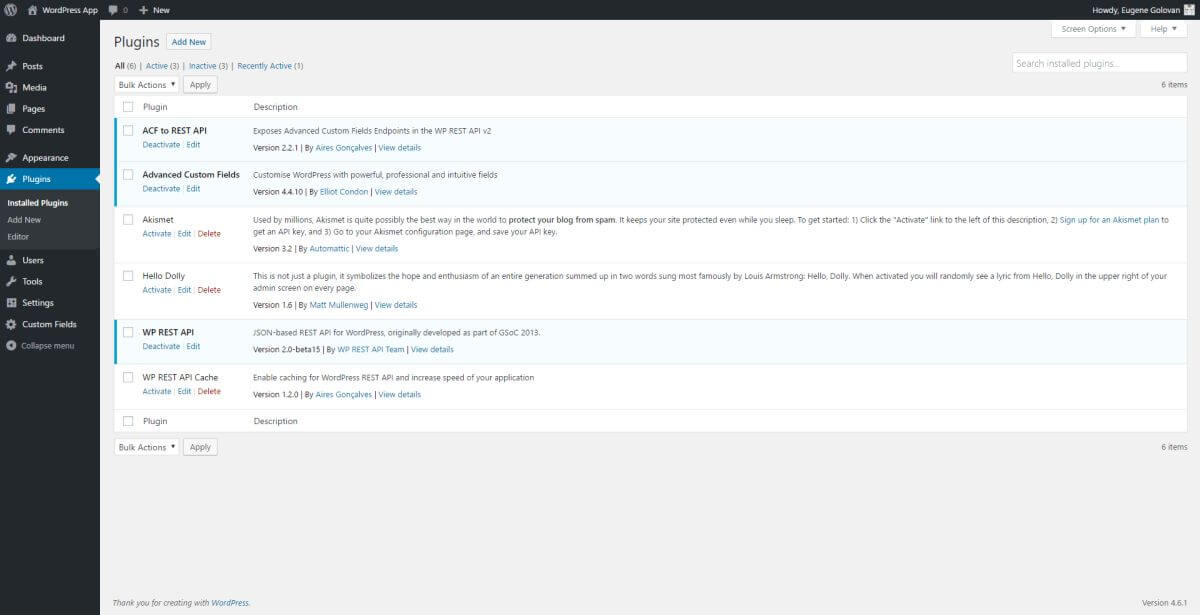
WP REST API plugin allows you to get all website data in JSON format for the application.
Advanced Custom Fields is a plugin for creating custom fields. It can store and receive settings and styles for our application. The free version of this plugin is suitable.
ACF to REST API is a plugin that enables REST API for custom fields to get data in JSON format.
WP REST API Cache is an optional plugin that greatly speeds up your application server response time. It is better to install it when all website settings are done.
For the current version of the application, only three custom fields should be created. At first, create a new WordPress page and, for instance, name it App Options.
Then go to the Custom Fields section and create a new fields group as shown in the picture.
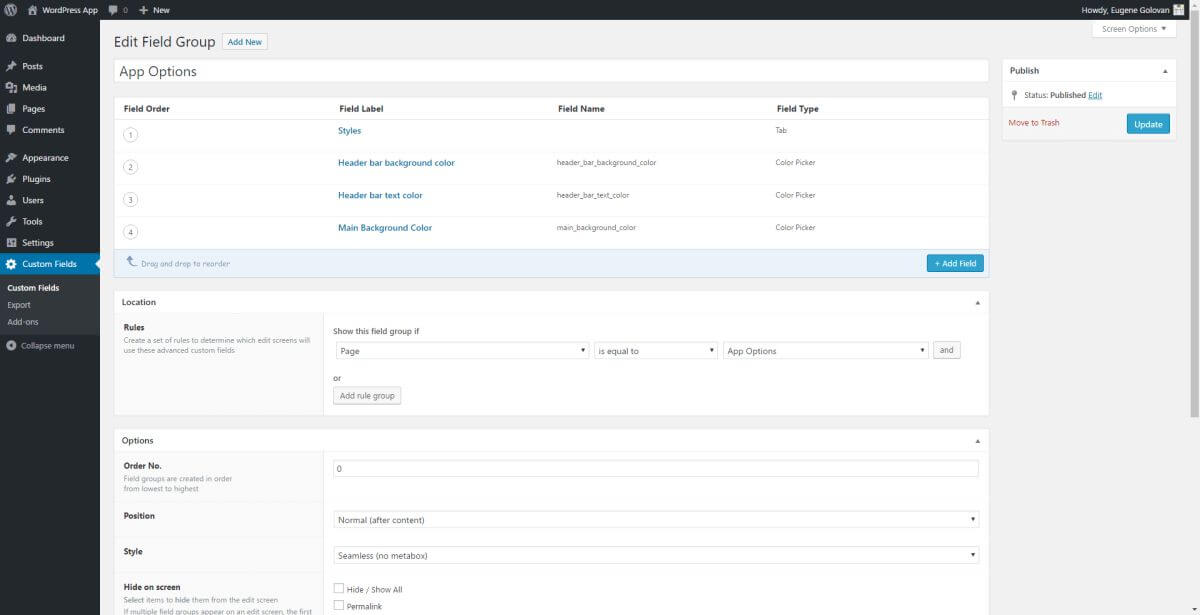
Then go to the App Options page and set the values for these fields. These values will be used in our app. In the future, you can expand options with new fields and plug it into the app if needed.
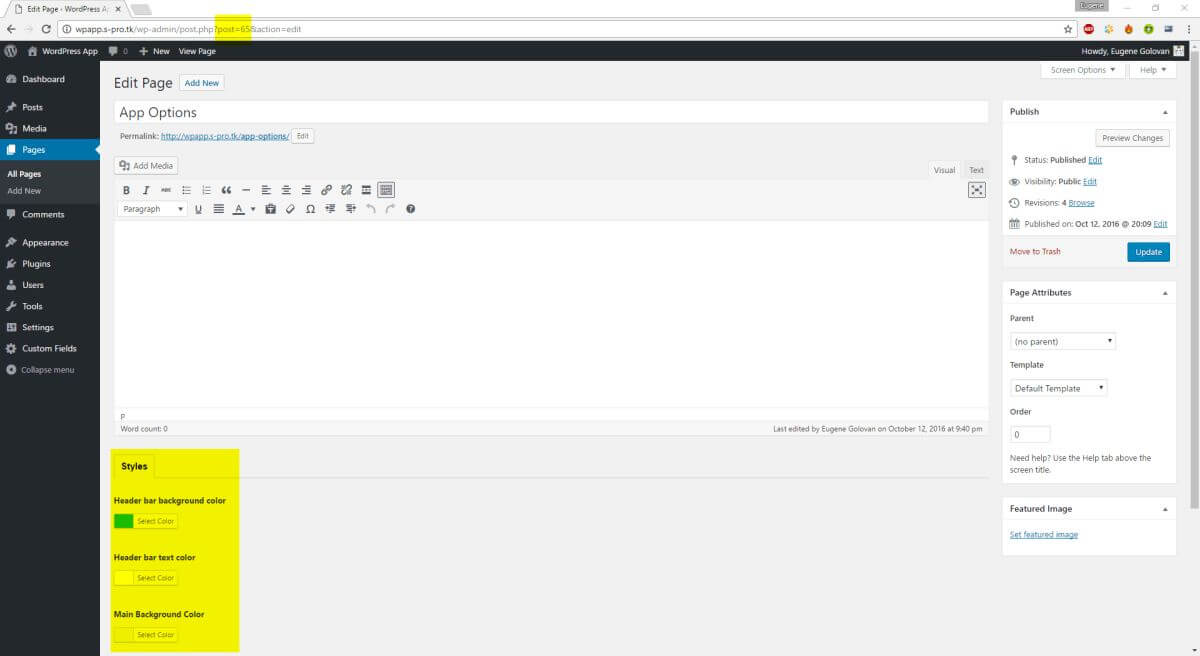
There are two areas highlighted in the picture: the current app styles at the bottom and the post ID at the top that will be needed soon.
Now all WordPress settings are finished. We can continue working with the application.
Step 3. Application Architecture
We used a standard that doesn’t need to be installed. At the end of the article, you will find instructions on how to install the latest version of the application.
The app contains several modules and it can be extended in the future.
Home page module
The Home page module is responsible for the application settings, as well as the initial data download (styles, options, users).
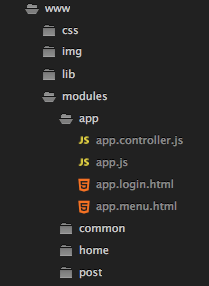
The following settings have to be changed.
ApiBasePath defines your website address plus you need to add /wp-json at the end.
OptionsPageId defines page ID with custom fields (look at the picture above with areas, highlighted yellow).
PostsPerPage – the number of posts per page. The app uses the infinitive load technology, so you don’t have to set some big value here.

This module also configures the sidebar of the app in the app.menu.html file.
Data receive module
The Data receive module receives all necessary data: application styles, records, users, etc.
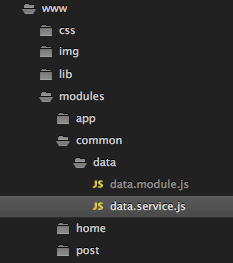
Home page module
The Home page module loads last posts from the site. By default, it shows the set number of posts and loads more data after scrolling the page down.
Post page module
The Post page module displays posts by ID. It gets the specific record data after clicking the list on the home page.
Step 4. Files structure
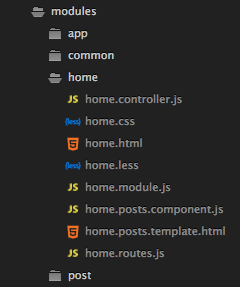
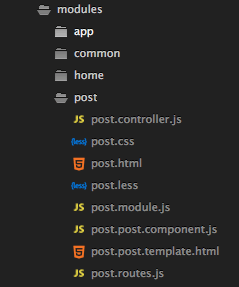
Let’s review the files structure of the home page module as an example.

Module.js declares the module.
Routes.js adds a new state and loads the WordPress site data. It also declares the controller as a syntax.
Controller.js defines what data will be displayed on the page. It also can additionally load the next posts.
Home.html displays the main page of the module. It contains the <posts></posts> block that will be treated by the component.
Component.js and template.html render post list.
Step 5. Android and iOS
You need to run the following commands to load all the necessary libraries and dependencies:
git clone https://github.com/S-PRO/app-press.git
cd app-press/wpapp
npm install
Run the Android command:
ionic platform add android
ionic run android
Run the iOS command:
ionic platform add ios
ionic run ios
Step 6. Possible additional functionality
If you want to go further, then it’s possible to add the following functionality:
- Video and pictures display.
- Push notifications of new messages.
- Dynamic menu.
- Styles expansion.
- Language and font size support.
- Analytics and social buttons support.
Conclusion
With this tutorial, we wanted to show you how to build an application based on hybrid web technologies and an existing website easily. The source code is available via the link above. Using this project, you can build your own app just in a few minutes.

